Joint installation and trouble shooting by Master Builders Solutions Nigeria
Sealant Installation Guide (basics)
Ensure all joint faces are clean, sound and free from any material which may hinder adhesion! Use primer where necessary. | 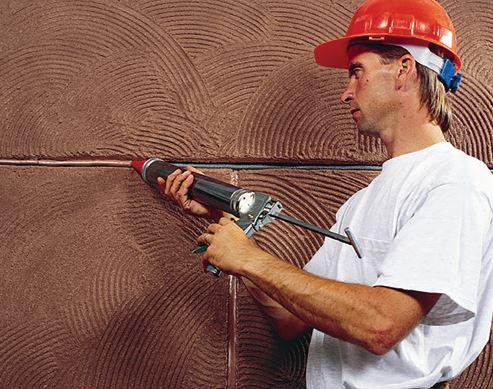 |
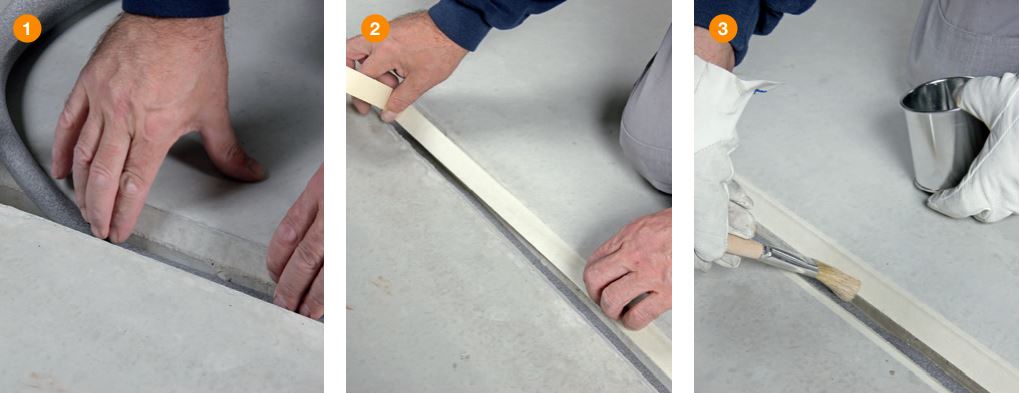

1. Insert backer rod to control depth of sealant: N.B. for joints >12 mm wide, depth = 0.5 x width.
2. Mask joint for best results.
3. Prime joint faces (only where necessary – see product technical data sheets).
4. Cut nozzle of cartridge or sealant gun at 45° to match width of joint and fill.
5. Tool joint to create optimum concave shape. Before sealant cures, removing masking tape
What are the main problems that causes a poor joint installation?
Problem | Primary cause | Other cause |
| Adhesive failure at bond line (photo 1) | Inadequate surface preparation: poor bond | Poor joint design: too narrow for movement. Sealant applied too deep, or 3 sided adhesion |
| Cohesive failure in sealant (photo 2) | 3 sided adhesion due to no bond breaker rod | Joint sealant applied too deep or inadequate movement capability of sealant |
| Cohesive failure in substrate | Modulus of sealant too high for weak substrate | 3 sided adhesion due to no bond breaker rod or inadequate movement capability of sealant |
| Crocodile skin cracking (photo 3) | Age hardening due to poor UV resistance, poor quality or low polymer content | |
| Multiple longitudinal cracking (photo 4) | Excessive shrinkage in sealant due to low polymer content and/or excessive plasticizers and solvents | |

Master Builders Solutions Nigeria Comprehensive Waterproofing and Sealant Portfolio
- Adhesives
- Cementitious Waterproofing
- Cold Liquid Applied Waterproofing
- Concrete Protective Coating
- Joint Waterproofing and Ancillaries
- Primers
- Sealants
- Sheet Membranes
- Spray Applied Liquid Waterproofing
- Traffic Deck Systems
- Underground Construction